You may be surprised to see how many very different skills are needed to make a faux bois table designed to weather the elements and stand the test of time.
Faux bois (which means false wood in French) is an art form dating back to the invention of ferrocement in Paris of the mid 1800’s. Whether it was sculpted 100 years ago or yesterday, each piece transforms dramatically during each step of the creation process.
As a maker of contemporary faux bois furniture, I’ve decided to take you on a photo journey to show you highlights of this process. I dug through my archives and selected a few key pictures that document the various stages of work on two of my favorite tables.
If you have a creative soul, you’ll probably be interested to see the phases of craftsmanship some pieces faux bois furniture go through before they land in a secret garden, public park, or private art collection
THE MAKING OF A “TREE” FAUX BOIS TABLE
Step 1: Inspiration
I let nature inspire me. When I want to create something truly unusual and natural, I bypass everything manmade, head out into the wilderness and let nature speak to me.
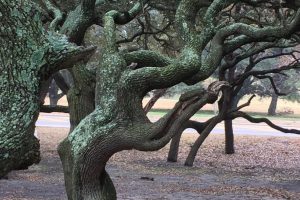
Here are examples I found in nature that inspired each faux bois table:
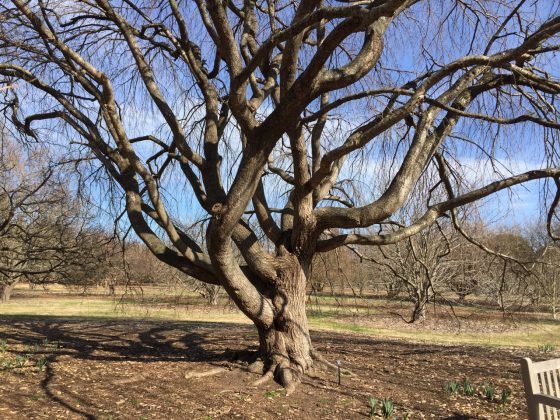
The curvy limbs of this tree gave me plenty of inspiration for my tree furniture
Step 2: Vision/Sketch
My ideas come in the form of visions. I see a finished piece in my mind. It’s not just that I see. it, either. I feel it as though it already existed in another dimension and needs to be brought forth. I create a sketch which becomes my blueprint for the project. Some ideas come to me quickly, fully realized and others are perfected over the course of weeks and even years.
Here are examples of original concept sketches of each table:
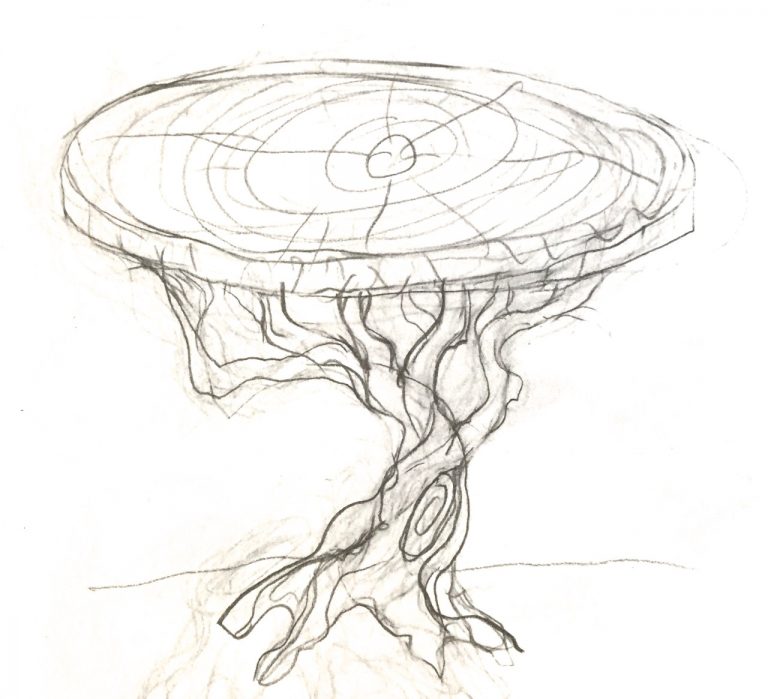
This was the sketch I used when building the tree table.
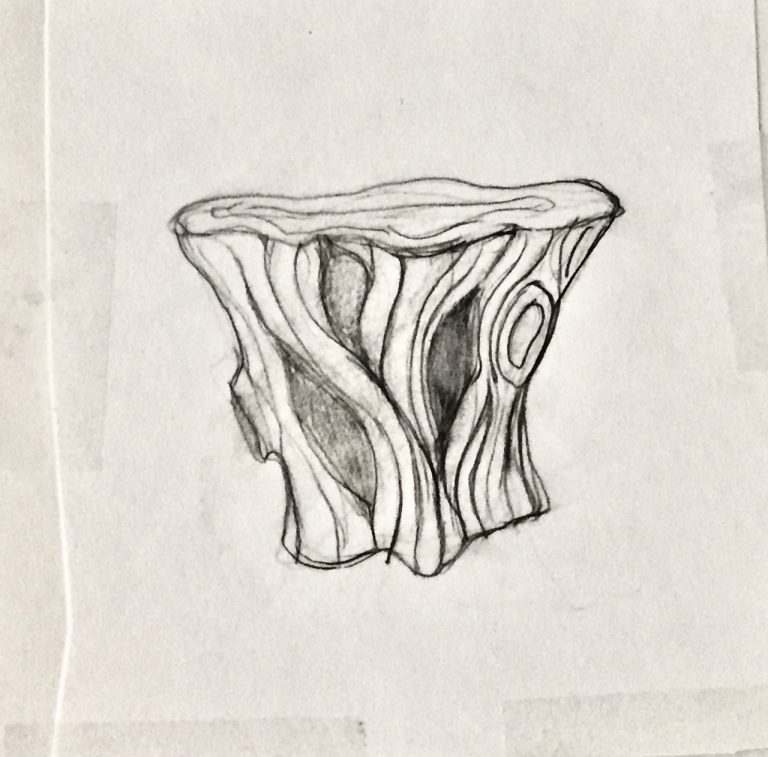
This stump table sketch shows cutouts, which were a challenge to build during the armature phase.
Step 3: Welding the armature
Concrete is actually a kind of epoxy, and its primary purpose is to strengthen and stiffen whatever it is adhered to, so I create a welded steel armature from rebar. I use MIG and oxy/acetylene welding rigs to help me build the “skeleton” of my concrete vision. Sometimes the design is altered a bit in this phase due to aesthetic or engineering issues. After all, it’s a long road from a small two dimensional sketch to an actual piece of the furniture that will function comfortably in the “real world”.
Here are photos of the welded steel armatures of each table:
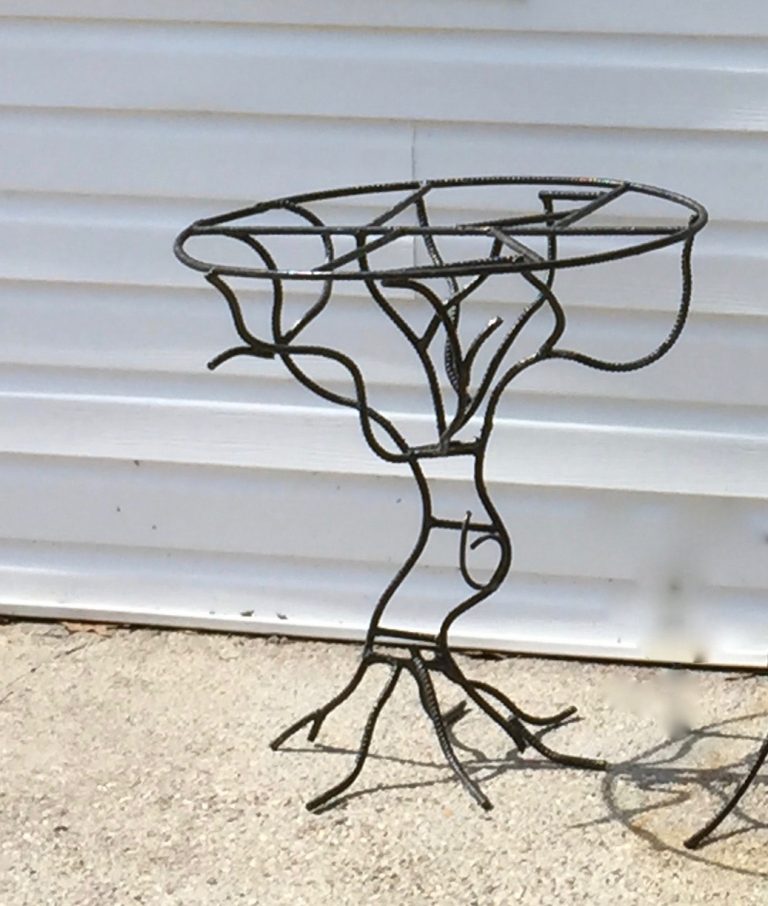
I welded rebar to create the basic shape for the tree table.
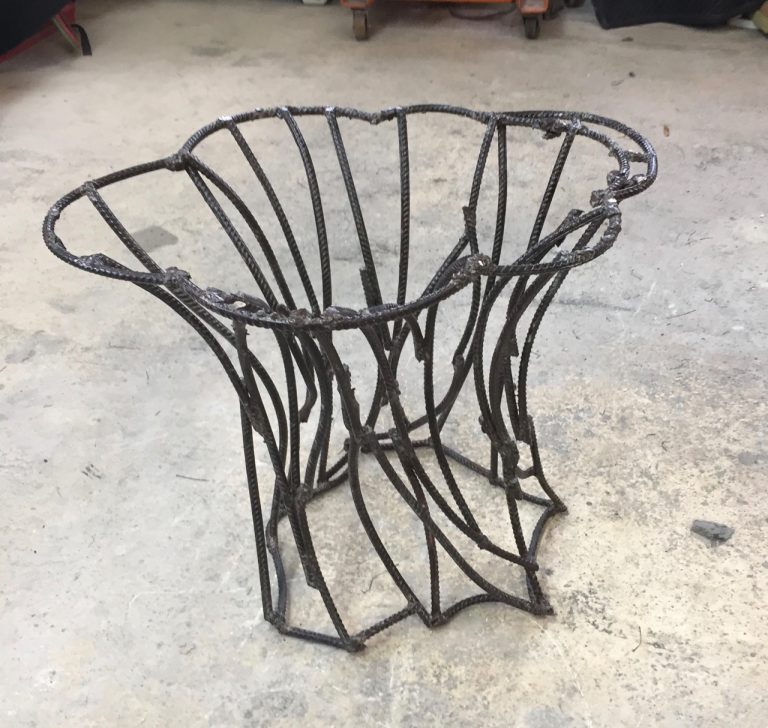
The faux bois stump table armature required complex patterns for openings
The undulations of the surface of the stump table, along with the cutaways, made for a very elaborate steel armature.
When the armature is completed, sometimes it looks like a metal sculpture. I wistfully understand that it will soon disappear forever beneath in layers of concrete, becoming an internal skeleton for my furniture.
Next, the rebar is covered with a bonding agent/rust converter specifically designed to protect steel from rusting or corroding when it is covered with concrete.
Step 4: Covering it in lath
Concrete needs something to grab on to when you’re free form sculpting, and prickly diamond lath fits the bill. It gets wrapped around rebar and is also good for bridging gaps between individual pieces of rebar. By the time this process is finished, I feel like I’ve completed a mesh garment, sewn together with stainless steel wire.
Here are photos of the welded steel armatures of each table covered in diamond lath.
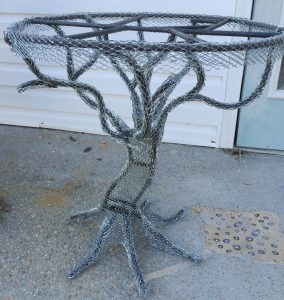
Mesh applied to faux bois table armature
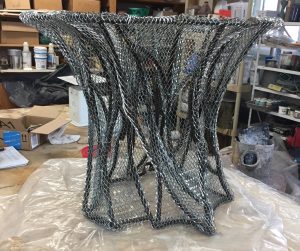
Step 5: Applying the structural coat
An extremely strong “rough” coat of engineered fiber cement is applied to every part of the steel armature, adding weight and durability. The general form of the table is built out and larger elements like knotholes begin to emerge.
Here are photos of each project being covered with fiber cement.

The branches and large design elements of the faux bois table begin to take form.

The faux bois cypress table’s profile is determined by the fiber cement layer.
Step 6: Applying the detail coat
I place a proprietary detail layer of cement with the consistency of fine porcelain clay. It has no sand or visible aggregate, but is designed to be very strong and hold even the finest details. I use a whole host of tools from a fork to fine wires to bring forth the original vision, which is continually evolving throughout the entire process. When this phase is finished, I keep the surface wet and warm so the concrete can cure to its highest possible strength.
Here are photos of each table with a newly applied detail coat.
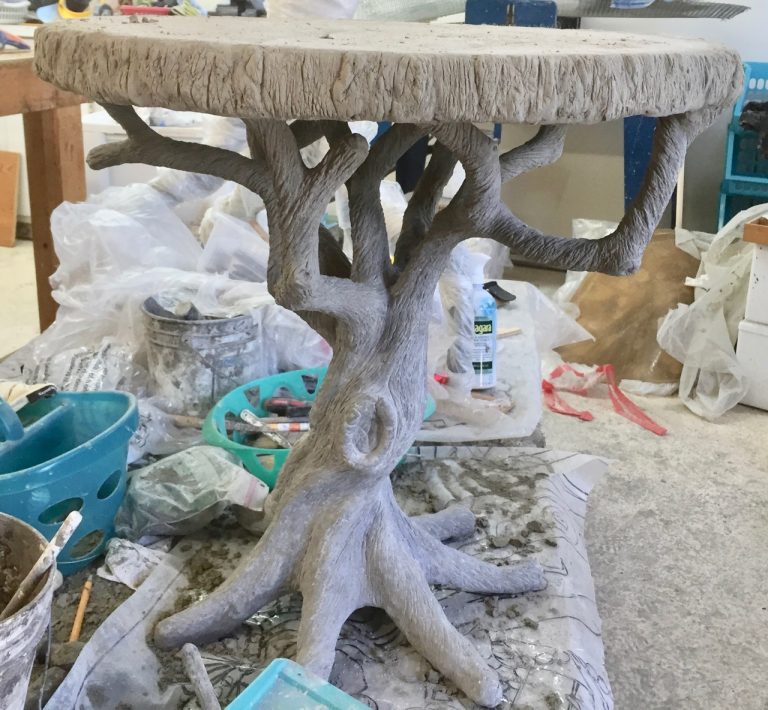
The detail coat of the faux bois tree table
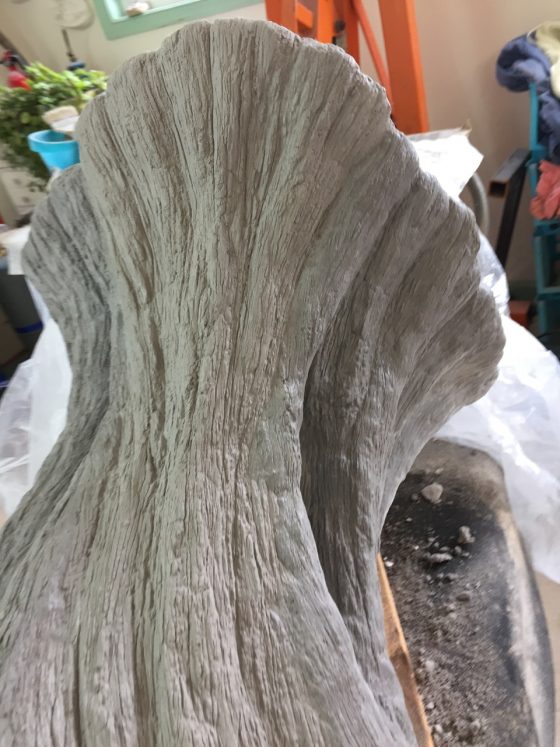
Faux bois cypress table detailing
Step 7: Coloring and sealing
My previous experience as a watercolor artist comes in handy when I’m trying to achieve realistic color effects with stains that mimic the randomness found in natural weathered wood. I use high quality, long lasting, and natural looking matt sealers which bring out the depth of details and protect the colors from UV rays. They also protects the table tops from stains and abrasion.
Here are photos of each table after the application of concrete stains and sealers.
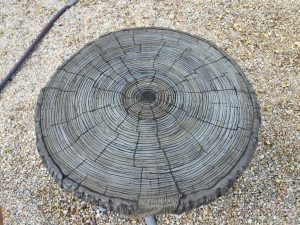
This table top had a mid grey integral color. I just enhanced the texture with and added some warm tones.
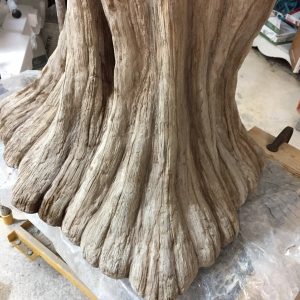
I layered acid stains on this faux bois table to get serious weathering effects.
After many days of hard work, all the 7 steps were completed and the faux bois tables were ready to head back out in nature where their inspiration came from in the first place.
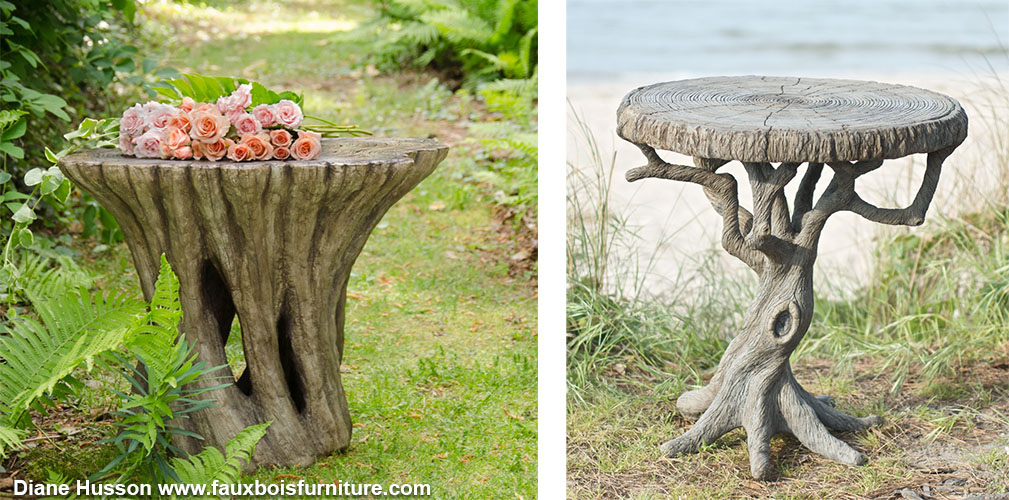
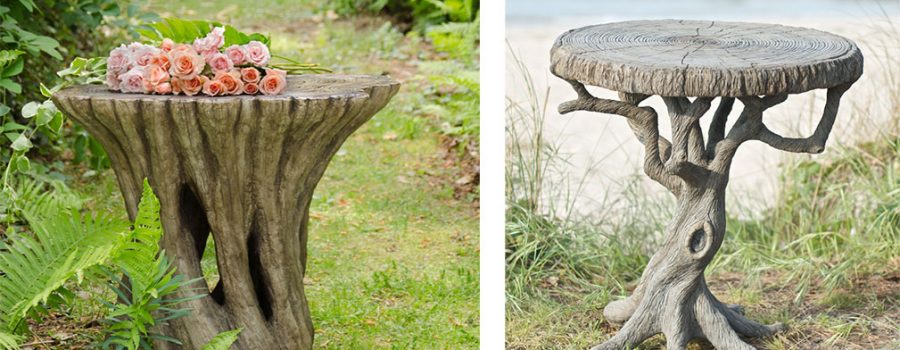
Finished faux bois tables
Diane Husson is a concrete sculptor specializing in the design and creation of contemporary faux bois benches and other faux bois furniture and accessories. She lives in Norfolk, Virginia. If you are interested in finding out more about her work, please visit her contact page.
