The Design Challenge
I live for sculpting faux bois furniture, and I love a good challenge! Especially when it involves making a bench! When an interior designer from Houston asked me to design and create a 60” diameter circular concrete faux bois “grotto” bench for her client in Florida, I jumped at the chance. I had always loved the look of these unique, classic style garden benches and this was my chance to create one from my own point of view.
The designer and her client wanted the faux bois bench to have my signature curvy, organic branch/vine style. This would include three armrests that could also serve as small functional tables. This circular garden bench was not going to be placed around a tree, but serve as a centerpiece for a covered entry area of a waterfront home on the Gulf of Mexico.
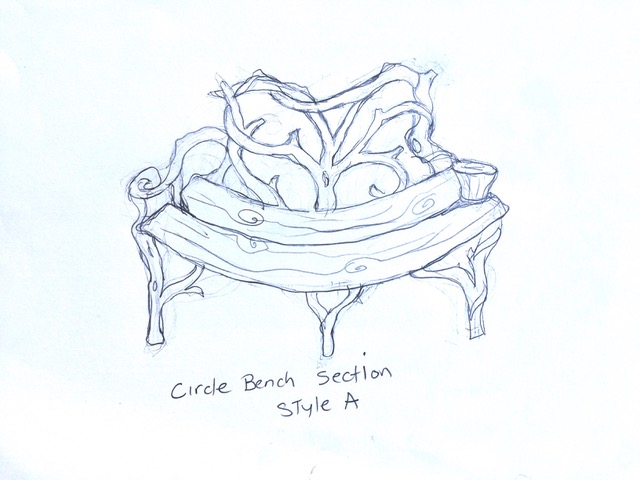
I really enjoy the challenges associated with sketching 2-D designs for 3-D faux bois furniture. The design for this garden bench came to me quickly–as though it were in the aether, just waiting to be lured out and captured on paper! (However, I must mention that sometimes small sketches drawn in a few minutes may take days and even weeks to fabricate in my studio!)
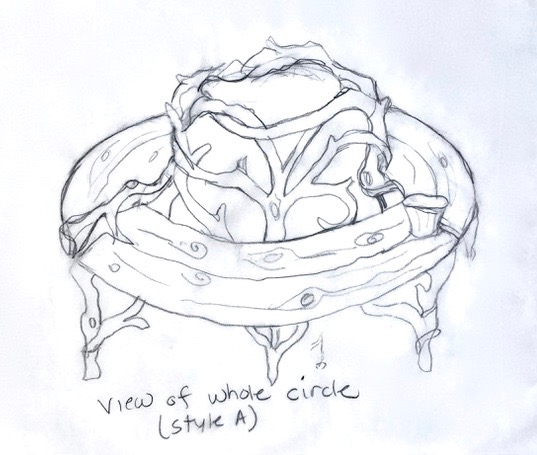
This was the approved sketch for the faux bois bench
Designing the Frame
One thing was certain: a 60” circular concrete faux bois bench would be heavy, so it would need to be created in sections. It would also be too large for transport in a our Chevy Astro van. The first puzzle I needed to solve was how to divide up the bench in a way that all the pieces would fit together seamlessly.
The divisions had to make sense aesthetically and practically. Should it be two halves? Thirds? Quarters? There were weight considerations (would two halves be extremely heavy to move around? Would quarters be too small? ) There were practical considerations (Where would the armrests be placed? How easily could the sections be transported or shipped?)
After thinking through all these issues, it made the most sense to design and construct it to be divided into thirds, creating three separate settees. Each grotto bench settee would have one unique armrest/table that straddled the division, minimizing the “seam” between the settees.
A sketch of one of the three bench sections which makes one third of the entire bench.
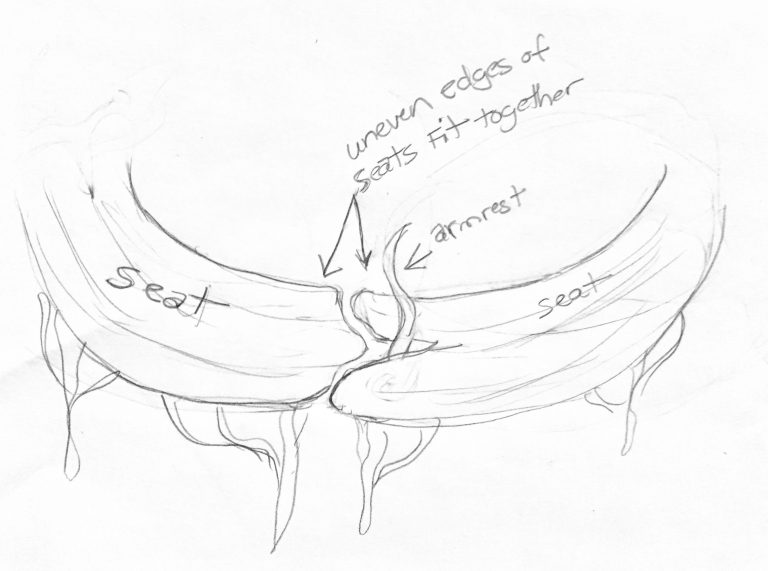
This sketch shows how the sections of the bench would fit together seamlessly
Welding the Frame
It’s hard to believe that something as large and lasting as a concrete faux bois bench begins with only an idea, a few lengths of rebar and several bags of cement.
It was time to shape the rebar and create the frame. I needed a 60” flat rebar circle, which would be the foundation for the concrete faux bois bench. The easiest way to accomplish this was to measure out lengths of rebar, forming spokes to a wheel. Then I could attach the outer edge of the seat, and that would form the outer edge of the circle.
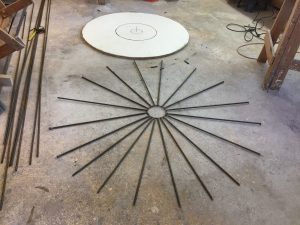
Welding a circle for the frame begins with “spokes” like a wheel
The bench seat is defined within the circle.
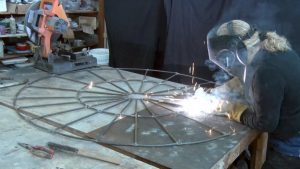
Next, I attached 15 legs to the circle. And joined rebar forming the back edge of the seat. Then I cut away the center of the circle, and had a stand-alone circle bench seat and legs. It was time to divide it into thirds.
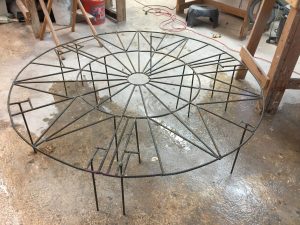
Legs are attached to the circle
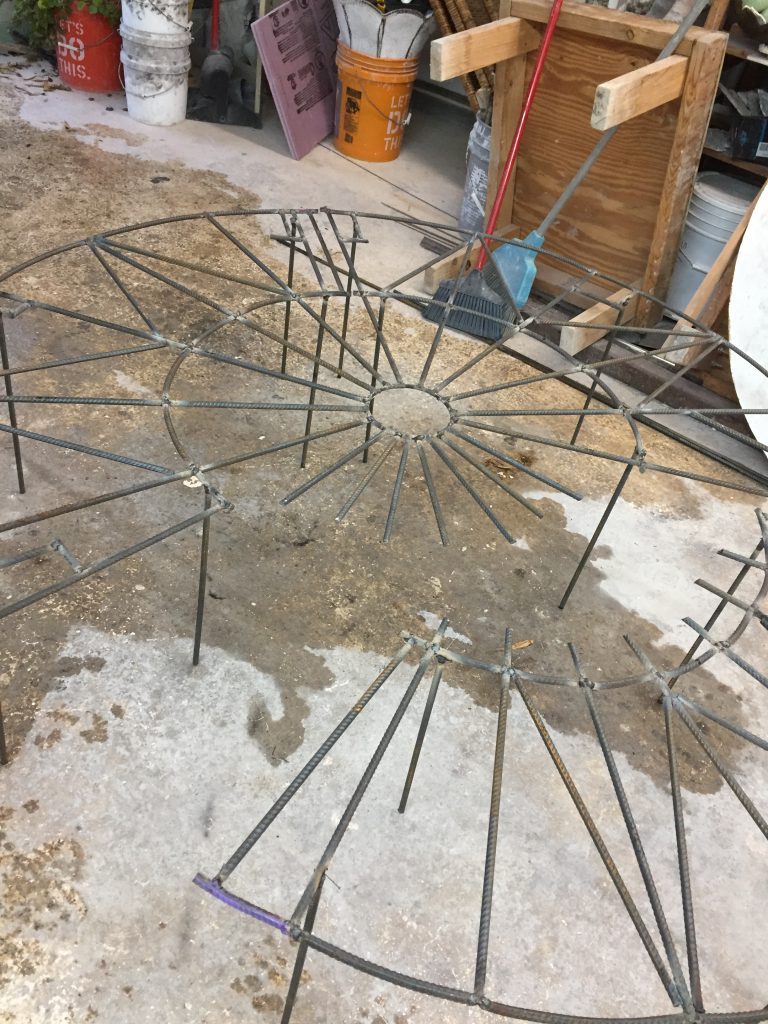
The rebar circle is divided into individual free-standing sections
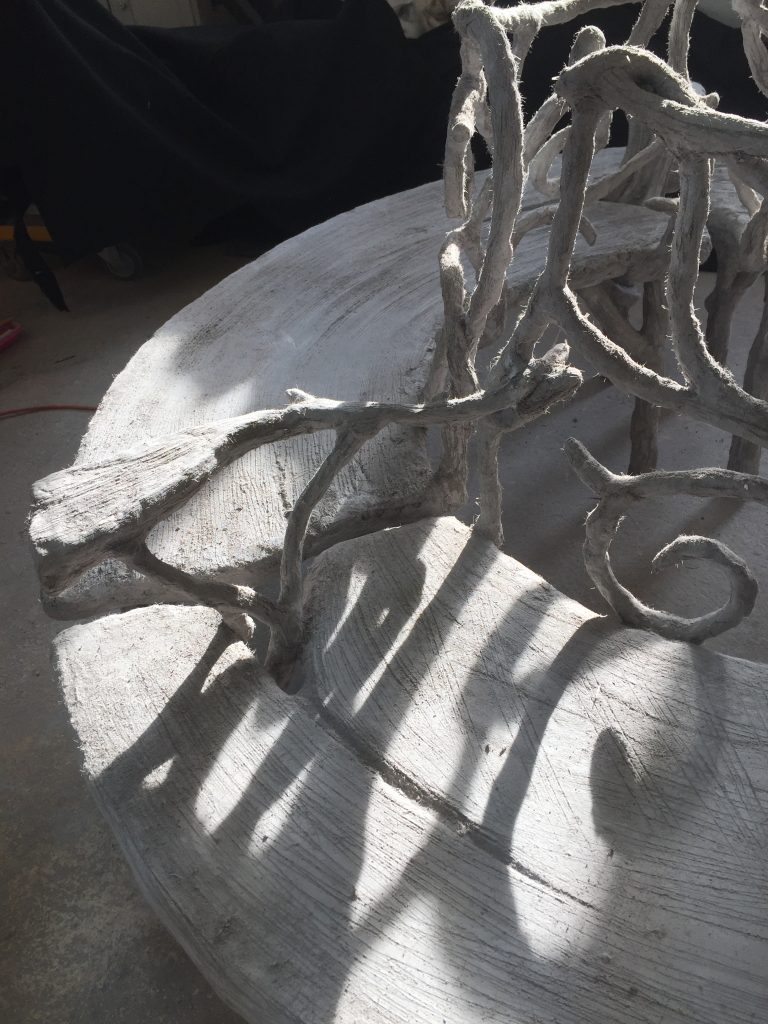
Now I was working on each “settee” individually when I attached the backs and armrests and added reinforcement to the seat.
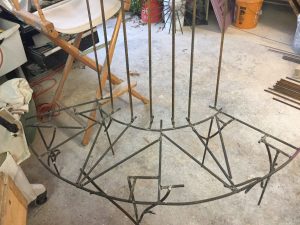
Upright lengths of rebar define the curve of the back. The decorative branch elements are welded along the curve. Later, the vertical rebar sections are removed.
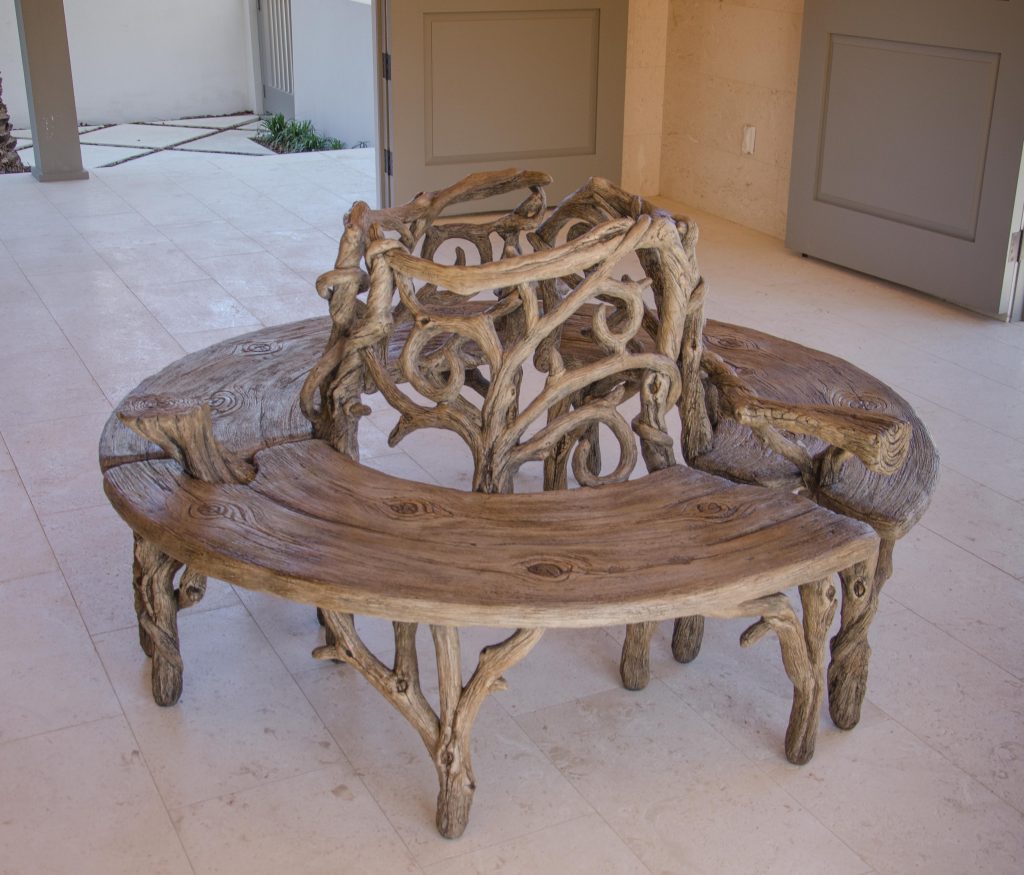
Once that was finished, I placed the settees together to make sure that they fit together physically and visually. The intricate frames of my faux bois furniture often look like ornate metal sculptures, and I take lots of photos, because eventually all that elaborate scrollwork will be covered in layers of concrete, never to be seen again.
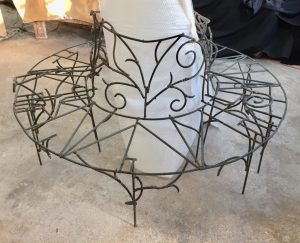
The steel armature of the faux bois bench is completed and ready for the next step of the process.
It took me several days to finish welding the armature for faux bois bench. Whenever I weld, I have an exhaust fan pulling fresh air from an open window to remove the fumes from the air. While I was welding, we had below freezing temperatures and the light sensor for the shielding glass on my welding helmet even stopped working!
Placing the Structural Cement Coat
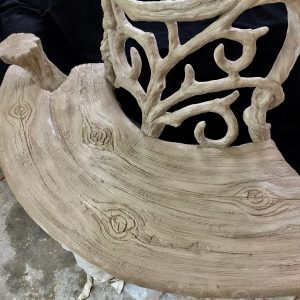
Once metal lath was placed over the armature to give the cement something to grab on to, it was time to place the cement. Over the next few days I built up layers of cement on the armature. I use a strong mix of high performance cement to which I add many different types of fibers to add strength to the mix. During this process, I rough in the larger shapes and contours. After the rough coat, I needed to put the faux bois bench sections back together to make sure everything was fitting properly.
The rebar and metal lath is coated with layers of fiber-reinforced cement. This structural coat makes the bench very strong .
Fiber cement coat of this faux bois bench.
Detail Cement Coat
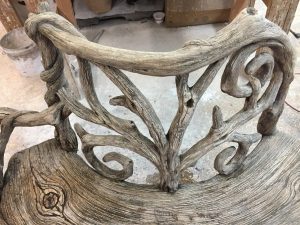
After the bench was covered by the structural coat, I spent many days sculpting all the intricate details, with a variety of tools, into a cement top coat that has the look and consistency of porcelain clay. Though it does not have visible aggregate, is very strong when cured.
A detail coat is applied. It has no visible aggregate and looks like porcelain clay.
The difference between the structural and detail coats is clear in this view.
Curing
After sculpting sessions, I cover the project with wet rags, plastic and apply heat to help the cement cure properly.
Staining and Sealing
When the cement phase was completed, I spent a couple of days applying permanent, reactive acid stains that mimic the look of real weathered wood. Finally, I apply a high quality catylized sealer to protect it from scratches, chemicals and moisture.
Acid stains are brushed on, giving the faux bois bench the natural tones of real weathered wood. Then several coats of a quality sealer are applied.
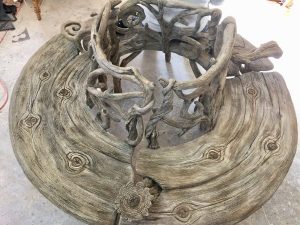
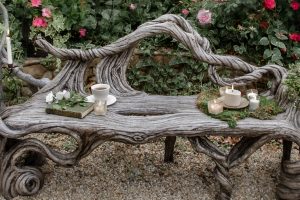
A top view of the stained and sealed faux bois bench.
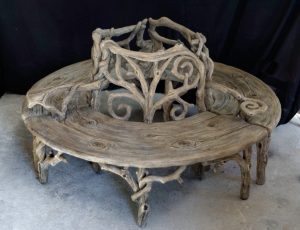
The faux bois grotto bench is colored, sealed, and ready to make the journey to Florida.
Transporting It to the Client
One advantage to dividing the large bench into thirds is that the pieces could fit into our van. I wanted to personally deliver this project to make sure it arrived safely and was set up properly.
Stopping for Photos Along the Way
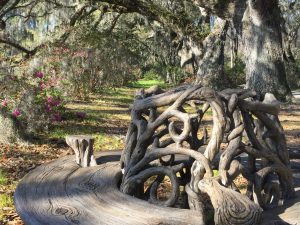
On our way to Florida, I couldn’t resist getting photos of the concrete faux bois bench on the beautiful grounds of the famous romantic gardens of the Magnolia Plantation near Charleston, SC. My husband Emile is an excellent photographer and took some stunning photos. He was happy to be able to use his new camera lens! I also had a lot of fun snapping photos on my iPhone for Instagram and blogs like this.
We were happy to photograph the bench beneath the spectacular tree tunnel at Magnolia Plantation in South Carolina.
I thought the bench looked at home in this lovely setting!
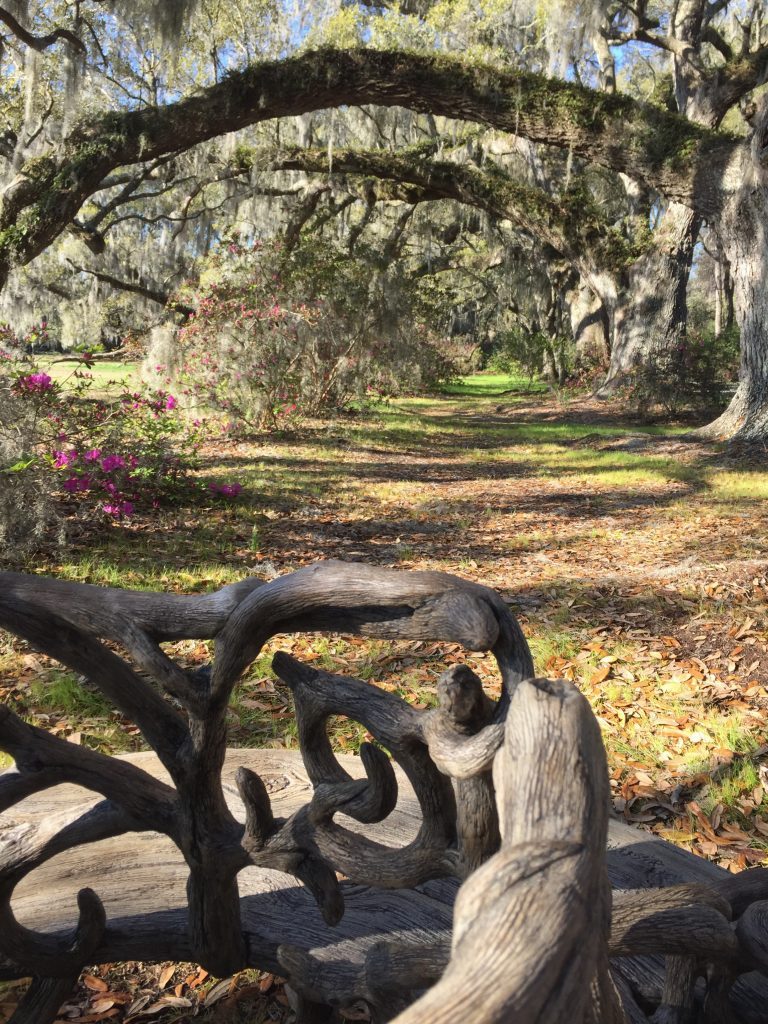
A spectacular setting for any bench, especially a faux bois bench!
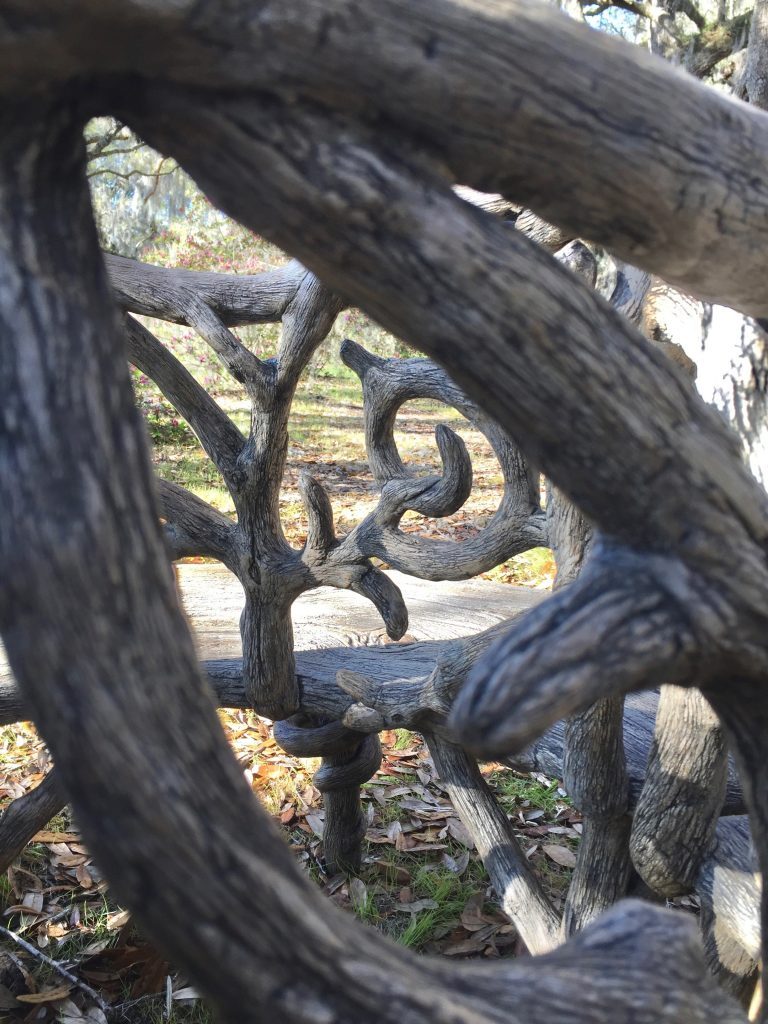
Detail view of the faux bois bench
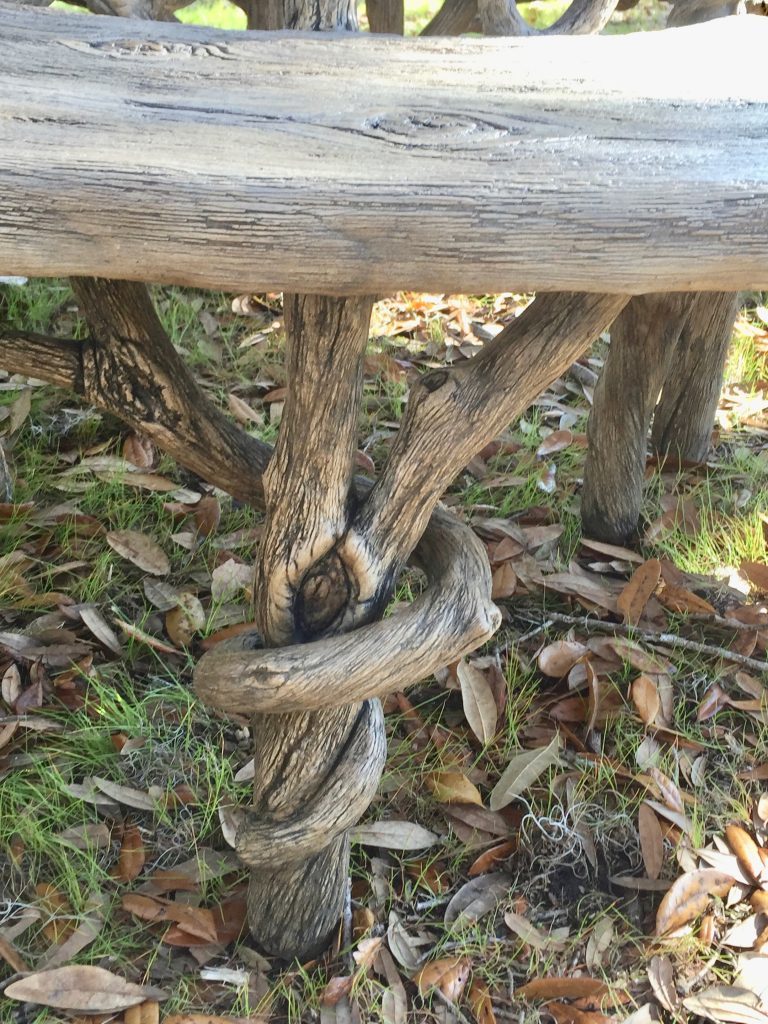
A closeup of one of the 15 legs of the faux bois bench
Delivery
Right after that we were on the road to Panama City Beach, Florida. We delivered the faux bois bench to a lovely new home on the Gulf of Mexico. The client and her designer were delighted and commissioned another large project!
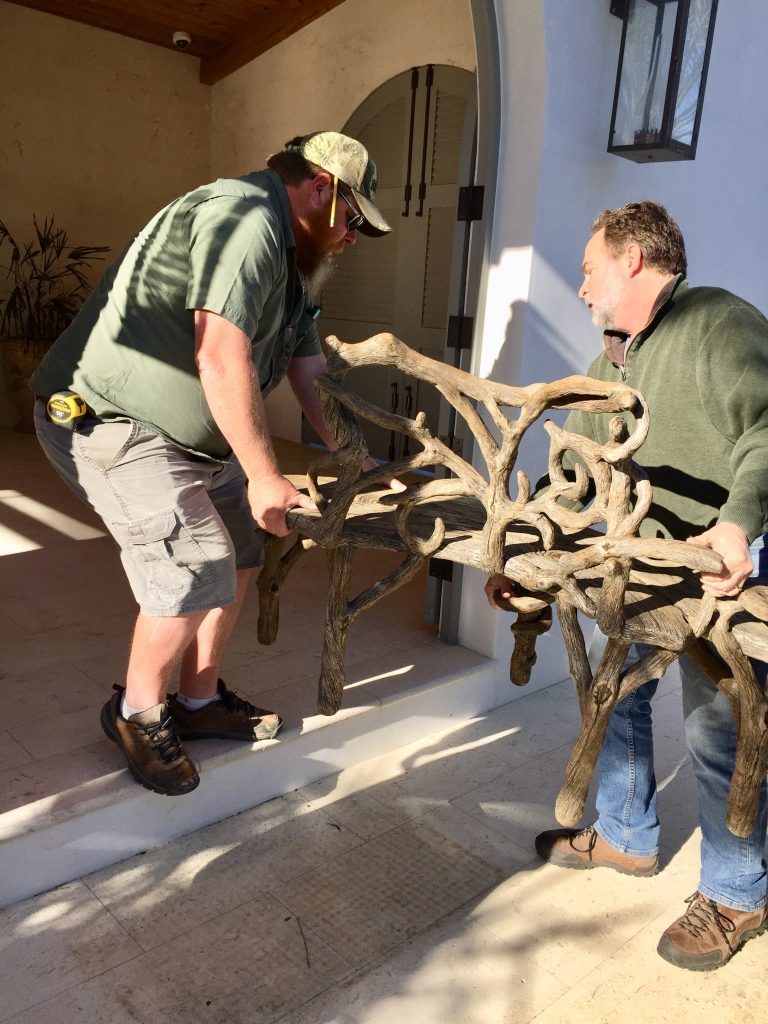
Emile (right) and the homeowner’s contractor carry the bench onto the zaguan (entrance porch)
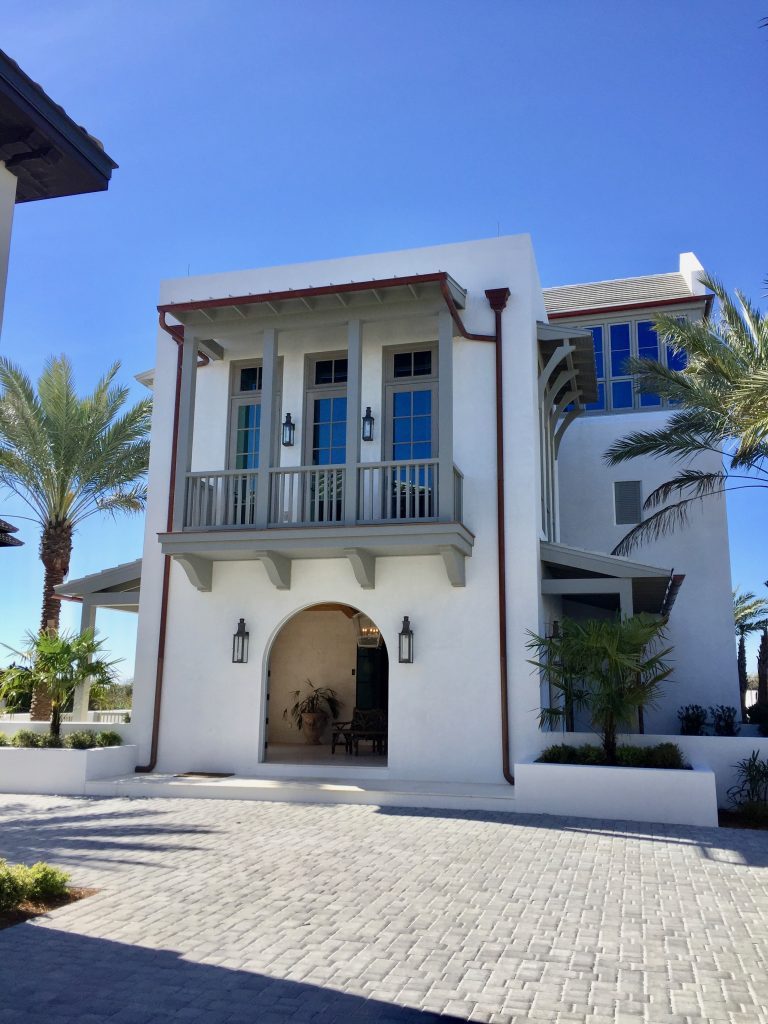
The final destination is a beach house in Panama City Beach, FL
The final destination is a beach house in Panama City Beach, Florida.

The view from the house is spectacular! My bench will be very happy here!
Though I’ll miss this particular piece of faux bois furniture (I’d lived with it so long in my studio!), I have great satisfaction that it went to a beautiful home where it is appreciated as heirloom quality artwork.
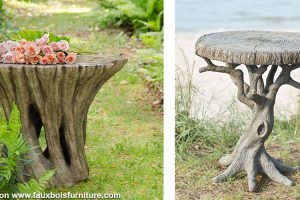
If you’d like to see other examples of Diane’ faux bois benches and other faux dos furniture, please visit my gallery.
Related blog: The 7 Secret Steps to Creating a Concrete Faux Bois Table